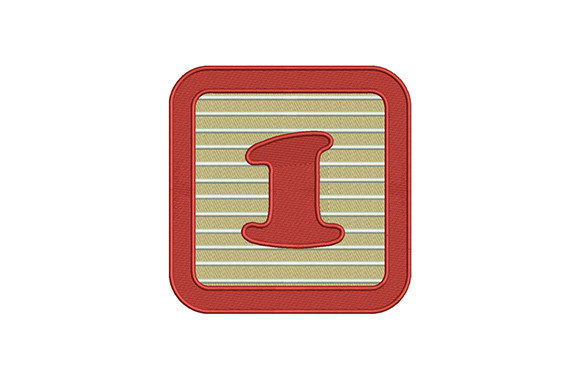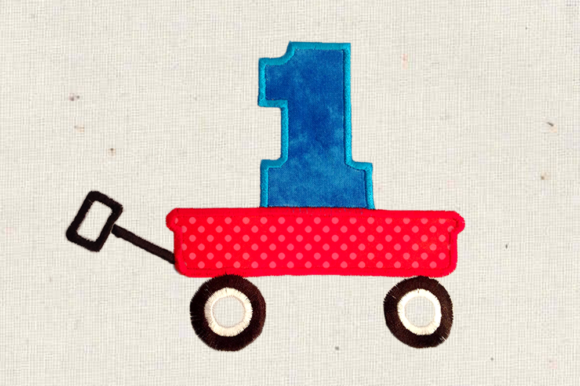
Toy Wagon with Number 1: A Designer's Review
When I first opened the Toy Wagon with Number 1 machine embroidery design, I knew exactly where it belonged. This is not a generic numeral slapped inside a random shape. The wagon gives the number one a sense of motion, of purpose. It feels like the start of something, which makes it an obvious choice for first birthdays, first grade celebrations, and any milestone where a child is taking a big step forward. As a designer who has stitched hundreds of custom orders, I can tell you that this embroidery file has a clear emotional hook. Parents want that, and they want it to stitch cleanly too.
The wagon itself is the kind of detail that elevates a simple design into something worth buying. It is not overly complicated, but it is thoughtful. The large number one sits inside the wagon bed, and the overall silhouette reads clearly even at a distance. That matters for small shop owners who sell at craft fairs or list products on Etsy. A design that reads from across the room gets more attention. I have seen too many delicate embroidery files that look lovely on a screen but turn into unreadable blobs after stitching. The Toy Wagon with Number 1 avoids that problem entirely. The shape is bold, the layout is balanced, and the visual personality is warm without being cluttered.
Where This Design Works Best in a Real Project
I recently tested this design on a custom tote bag for a client whose son was turning one. She wanted something that felt personal but not overly cutesy. The wagon with the number one hit that tone perfectly. I used a medium-weight cotton tote, stabilized with a tear-away backing, and the design stitched out without any shifting. The fill stitch areas in the number one were smooth, and the satin stitch outlines around the wagon gave it a crisp, finished look. The client was thrilled, and I ended up making two more for her nieces' first birthdays.
This design also works beautifully on sweatshirt embroidery and baby apparel. I have placed it on the front of a toddler-sized hoodie and on the back of a denim jacket for a first birthday photoshoot. In both cases, the stitch density was appropriate for the fabric. On the sweatshirt, I used a cutaway stabilizer to keep the stitches from distorting, and the design held its shape after multiple washes. For embroidered patches, this design is a natural fit. The wagon shape can be digitized as a patch outline, and the large number one makes it easy to trim around. I have seen patch makers use this file for iron-on appliques that go onto backpacks, lunch bags, and even diaper bags.
I have also tested it on a pillow cover for a nursery. The wagon and number one theme works well as a decorative accent in a child's room. I stitched it onto a linen-cotton blend pillow cover and used a medium-weight cutaway stabilizer. The design sat nicely on the fabric, and the stitch details held up well. For tea towels and kitchen linens, I would recommend this design only if the towel has a smooth weave. Terry cloth or heavy looped towels might swallow the finer stitch details in the wagon wheels. Stick to flat-weave fabrics for the best results.
Where You Need to Be Careful
No embroidery design is perfect for every surface, and the Toy Wagon with Number 1 has a few limitations worth noting. The design has a moderate level of detail, especially around the wagon wheels and the handle. If you try to stitch it in a very small hoop size, those details can become crowded. I recommend checking the recommended hoop size before you buy the file. If you are working with a 4x4 hoop, make sure the design dimensions fit comfortably without forcing the needle into tight corners.
On textured fabrics like fleece or heavy knits, the wagon wheels can lose some definition. I tested this on a thick fleece blanket and had to increase the underlay density to keep the satin stitches from sinking. If you are stitching on fleece, use a thick cutaway stabilizer and consider a test stitch on a scrap piece first. On thin fabric like lightweight cotton or voile, the design may cause puckering if the stitch count is too high. I recommend a lightweight stabilizer and a slower stitch speed for delicate fabrics.
For curved surfaces like caps, this design is not ideal unless the wagon and number one are digitized with a curvature correction. The flat layout of the wagon does not naturally conform to a curved hat brim. If you absolutely want to put it on a cap, use a hoop that allows the design to be placed on the front panel, and test it on a practice cap first. The same caution applies to layered garments like jackets with zippers or pockets. Make sure the design area is flat and free of bulky seams.
Another consideration is dark fabric. The number one is solid and reads well, but if you are stitching on black or navy, make sure your thread color provides enough contrast. A light gray or white thread works well on dark backgrounds. I also recommend a white bobbin thread to prevent show-through. On light fabrics, dark thread colors like red or blue give the design a strong pop. Testing the design in black and white mockups before stitching helps you see whether the contrast is sufficient.
Visual Appeal, Product Value, and Buyer Trust
In my experience, the Toy Wagon with Number 1 has a strong impact on how customers perceive a finished product. When I listed a custom tote bag with this design on my Etsy shop, it received more saves and inquiries than similar items without a personalized number. The wagon element makes it feel like a complete story, not just a numeral. Buyers respond to that. They see a design that looks like it was made for their child, not mass-produced. That perception of care and thoughtfulness translates directly into higher perceived value and a willingness to pay a premium.
For small shop products and boutique merchandise, this design adds a layer of professionalism. It is not a generic clip-art style embroidery file. It has a handmade quality that aligns well with the aesthetics of modern parents who want personalized, meaningful gifts. I have used it for holiday embroidery as well, stitching it onto a Christmas stocking for a child's first holiday. The wagon and number one felt appropriate for the occasion without being seasonal, which gives the design year-round usability.
When customers see a clean, well-stitched design like this, they trust the maker. They assume that if the embroidery is precise, the rest of the product is also well-made. That trust is hard to build and easy to lose. A design that stiches out reliably helps you maintain that trust. I have never had a customer complain about the quality of this design when it is properly stabilized and hooped. That consistency matters when you are building a craft business or selling design assets to other embroiderers.
Practical Designer Notes for Real Use
Before you stitch the Toy Wagon with Number 1 on a final product, I highly recommend running a test on scrap fabric. This is not because the design is problematic, but because every fabric behaves differently. Test it on the exact fabric you plan to use, with the same stabilizer and thread. Check whether the wagon wheels maintain their round shape and whether the number one fills evenly. If you see any gaps in the fill stitch, adjust your tension or try a different needle.
Thread color choice matters more than you might think. For a first birthday gift, pastel or bright colors work well. For a first grade milestone, consider school colors or a bold red number one with a natural wood-toned wagon. I have also seen this design stitched in metallic thread for a special occasion, though I recommend a slower speed to avoid thread breakage. Always confirm the thread colors recommended in the design file, but do not be afraid to customize them. The design is versatile enough to handle color changes without losing its visual appeal.
Check the stitch density before you start. If the design has dense areas, especially in the number one, make sure your needle is sharp and your machine is properly oiled. Dense designs can cause skipped stitches on machines that are due for maintenance. I also recommend using a stabilizer that matches the fabric weight. For medium-weight fabrics, a tear-away stabilizer works well. For stretchy or lightweight fabrics, use a cutaway stabilizer to prevent distortion. If you are stitching the design as an applique design, make sure the fabric you use for the wagon and number one does not fray too much. Felt or cotton blends work well for applique versions.
If you are a digital embroidery file seller or designer, confirm the licensing terms before you include this design in a commercial project. Some design files have restrictions on how many finished products you can sell or whether you can modify the file. I always advise checking the license before stitching for clients or listing items online. It protects both you and the original digitizer. For personal use, the design is straightforward and forgiving. For commercial use, just make sure you have the right to sell the finished product.
Final Thoughts on the Toy Wagon with Number 1
After working with this design on multiple projects, I can confidently say it is a solid addition to any embroidery designer's library. It works for custom apparel, personalized gifts, boutique products, and even printable mockups for digital previews. The wagon theme gives it a narrative quality that generic number designs lack, and the stitch quality is reliable when handled with care.
If you are an Etsy seller, a small shop owner, or a hobbyist looking to expand your design collection, this file is worth your attention. It earns its place in a Back To School category because it captures the excitement of a new beginning, and it fits naturally into a baby or toddler Embroidery collection. Just remember to test it first, choose your fabric wisely, and pay attention to the details that make handmade products stand out. The Toy Wagon with Number 1 is a design that rewards thoughtful use, and your customers will notice the difference.